The Timeline feature of Windows 10 helps users review previous activities, but if you feel this feature is annoying, there is a way to disable it. This article will show you how to turn off the Timeline feature on Windows 10.
Timeline on Windows 10 is a feature that uses Microsoft Graph and allows users to return to activities (eg apps, documents, websites) that worked previously. These activities may have started on the same computer or other devices, such as laptops, tablets and even phones connected to the same Microsoft account.
To continue working on devices, Windows 10 will have to monitor the computer’s activities, which for many users is not a big problem, but for some people, this may be the problem. about privacy or security.
How To Disable The Timeline Feature On Windows 10
- Using Settings Disable The Timeline Feature
- Using Group Policy Editor Disable Timeline
- Disable Timeline using Registry Editor
Using Settings Disable The Timeline Feature
To disable the Timeline, you need to turn off your Windows 10 activity history.
Step 1: Open Settings.
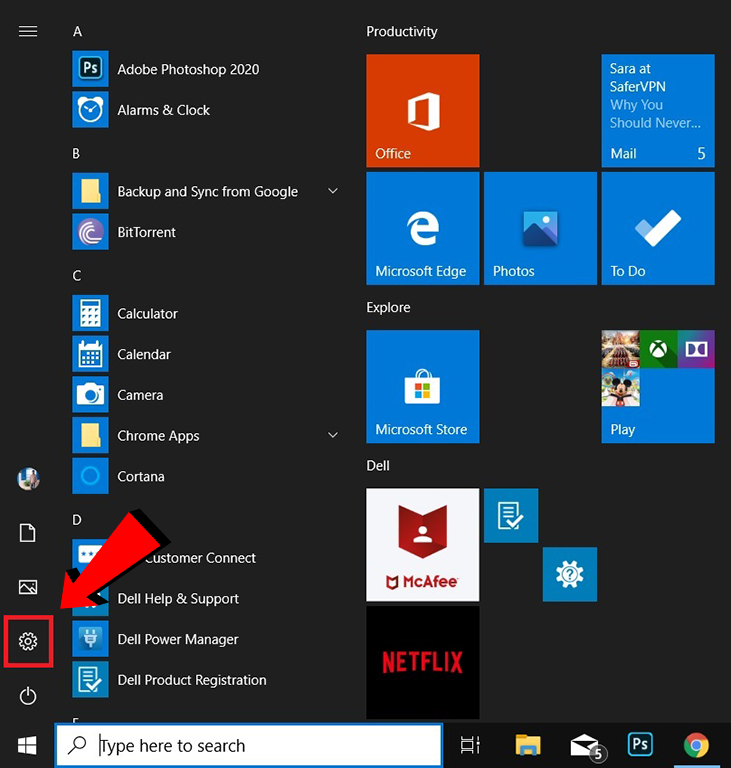
Step 2: Click the Privacy. As shown in the image below.

Step 3: Click on the Activity history option under Windows permissions in the sidebar and then uncheck the “Store my activity history on this device” checkbox. Windows will no longer collect any new activities for the Timeline.
Even after you disable the collection of activities, Windows still shows activities it has previously collected in your Timeline. If you have Timeline enabled and syncing to your other PCs, it also shows activities from those other PCs in your Timeline.
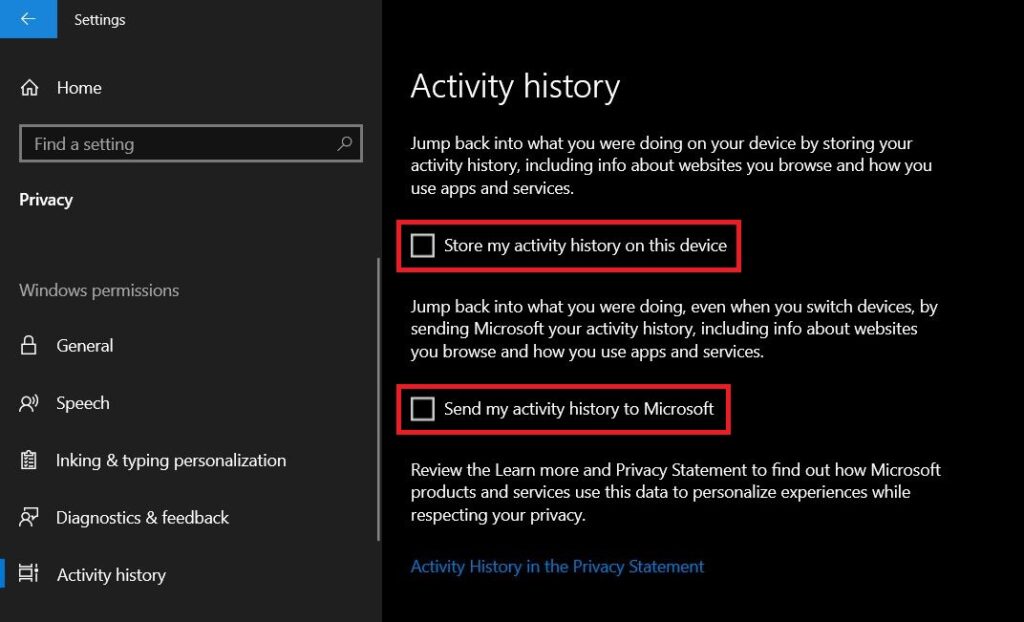
Step 4: Uncheck the “Send my activity history to Microsoft” checkbox to turn off the syncing with your Microsoft account.
Step 5: To prevent activities from syncing to your PC. Toggle any Microsoft account that appears under “Show activities from accounts” to the “Off” setting.

Step 6: Under “Clear activity history“. Click the Clear button.
Step 7: Click the OK button to confirm.
The Timeline vanishes from the Task View interface after you perform the above steps.
If you have an empty desktop and look at Task View, you’ll see a “Use your PC to see more activities here” message, but no activities will appear until you re-enable this feature.
Using Group Policy Editor Disable Timeline
If you are a system administrator, the fastest and easiest way to disable Timeline is by using Group Policy Editor.
Step 1: Open Group Policy Editor by searching gpedit.msc in the Start menu.
Step 2 : After opening the Group Policy Editor, navigate to Computer Configuration -> Administrative Templates -> System -> OS Policies . On the right panel, double-click the Activity Feed Enables.

Step 3: Select ‘ Disabled ‘ in the properties window to turn off the Timeline, then click the ” OK ” button to save the changes.

Step 4: Restart the system for the changes to take effect. If you do not want to reboot, open Command Prompt as an administrator and perform the command gpupdate.exe / force.
To re-enable Timeline, select the Enabled or Not configured option in the properties window.
Disable Timeline Using Registry Editor
Without access to Group Policy Editor, you can disable Timeline by using Registry Editor. All you have to do is create a unique registry value. Before continuing, back up the Registry in case something goes wrong.
Step 1: First, search for regedit in the Start menu and open it, then navigate to the location below:

HKEY_LOCAL_MACHINE\SOFTWARE\Policies\Microsoft\Windows\System

Step 2: Right-click on “System” and select New -> DWORD (32-bit) Name the Value “EnableActivityFeed” and press Enter to confirm the new name.

Step 3: Double-click the newly created value, enter ‘ 0 ‘ in the Value Data field, and click the ‘ OK ‘ button to save the changes.

Step 4: In order for the changes to take effect, restart the Windows system. After restarting, the Timeline will be disabled. If you want to turn on Timeline again, change Value Data from ‘ 0 ‘ to ‘ 1 ‘.
So those are the two ways you can remove Disable Timeline Feature from your Windows 10 PC. While the Registry hack works most of the time, Microsoft sometimes reverses the change after an update. So if you are facing such an issue, go with the more powerful Group Policy Editor which controls the behaviour of all system applications on Windows 10 Pro. Anyway, that is all from us. If you found the article helpful, do let us know in the comment section below.