
Wi-Fi enables all of your devices to be connected to the internet without any physical connection. However, this convenience also comes with security risks. Unlike physical cables, Wireless Internet connections are easy to hack.
Why Secure Your Wi-Fi Network?
Well, if someone hacks your Wi-Fi network, they will not only leech on your Internet bandwidth (leading to slower speeds and more data consumption). But the scary part is, someone with the right tools can also see what you are browsing on the internet, steal passwords, control your activity and even send fake emails from your connection that could lead to law forces acting against you.
Overall, Wi-Fi security is crucial and in this article, we will take you through all the necessary steps you can take to secure your Wi-Fi. So, let’s get started, shall we?
Before We Begin To Secure Your Wi-Fi Network!
Note: Each router has a different interface with options located in different areas, so I cannot provide any universal instructions that may work for all the routers. Although I will try my best to give you the right pointers, that should work for most routers.
Also, in most routers, when you make the following changes to the Router settings; your Router might restart, resulting in no internet access for a few seconds. So make sure you don’t do this if someone at your home is doing important work online.
How To Secure Your Wi-Fi Network
Step 1: Access Your Router’s Settings
There is no way to control your Wi-Fi settings from any desktop or mobile software. All of the steps we will be taking to secure the Wi-Fi will be from the settings page of your router.
So, open up your web browser, and type in the router’s IP address (usually 192.168.1.1) in the Omnibox and hit enter. If you don’t know what your router’s IP address or default gateway is, check out this post on finding the router IP address on different platforms.
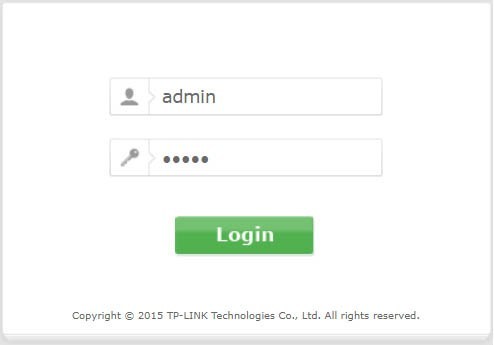
Now, when you enter the router’s IP address, you will be asked for the username and password. Here comes the username as “Admin,” and password as “password.” If this password doesn’t work, then try, “admin,” “12345,” or maybe the name of the router’s company. If nothing works, then call the router company or the person who has set up your network and ask for the login credentials. You can also call your ISP if they have provided you the router.
Step 2: Change Your Encryption To WPA2
The most popular way to hack Wi-Fi is by guessing the password from a public database or trying the combination of every English character. Software like Aircrack-Ng and Reaver can crack WEP and WPA-PSK passwords in a few hours.
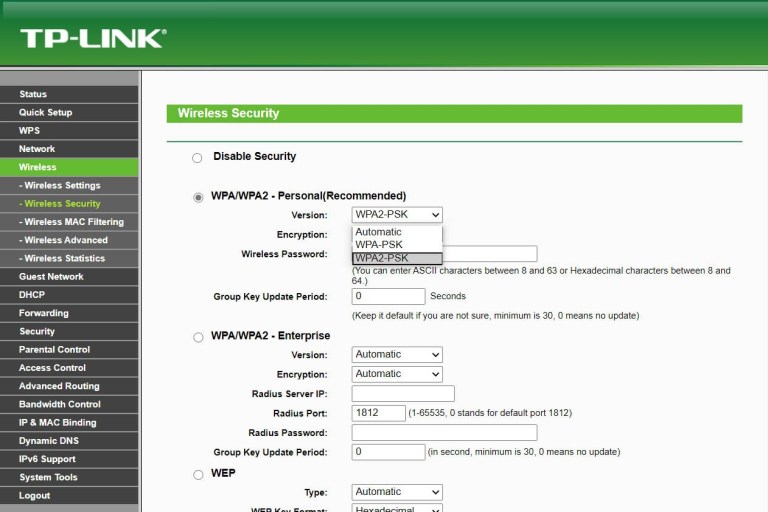
So, if you are still stuck with WEP, WPA security- or worst of all have an open Wi-Fi connection, then the first thing you need to do is enable the WPA2 encryption. Encryption is the only sure-shot method to stop hackers from gaining access to your router. To enable WPA2 encryption, go into your router settings, and look for the “Wireless Security” option. If you find the option of “Wireless” instead, then search for the “Security” option somewhere inside it.
Here you should see a drop-down menu next to an option like “Network Authentication” or “Encryption.” Click on it, and you should see a list of encryptions you can use, select “WPA2”. And while you are at it, also consider changing your Wi-Fi password to something that people can not guess.
For instance – I don’t suggest using a complex password like these ^55[@5(W^GR<L=z as your Wi-Fi password, because then you’ll have a hard time explaining this password to your friends. But make sure your password is not a dictionary word or something easy to guess like your first and last name (I know people who use that). A right Wi-Fi password is something like — Fr33Int3rn3t. Just say the password is free internet, with f and I in upper case and replace all thee with number 3.
The security steps we are listing below should always be used in conjunction with WPA2 encryption as it is the only way to truly protect your Wi-Fi. The methods below will just make it hard for hackers to get to your router, these methods can’t protect you against an attack.
Step 3: Change The Router’s Default Password
Most people stick to the router’s default password. This is a bad practice because, if anyone is connected to your Wi-Fi (could be a friend to whom you gave your password), they can also easily access router settings and change the settings to their heart’s desire. They can even log you out of your network. So it’s essential to replace the router’s default username (if allowed) and password.
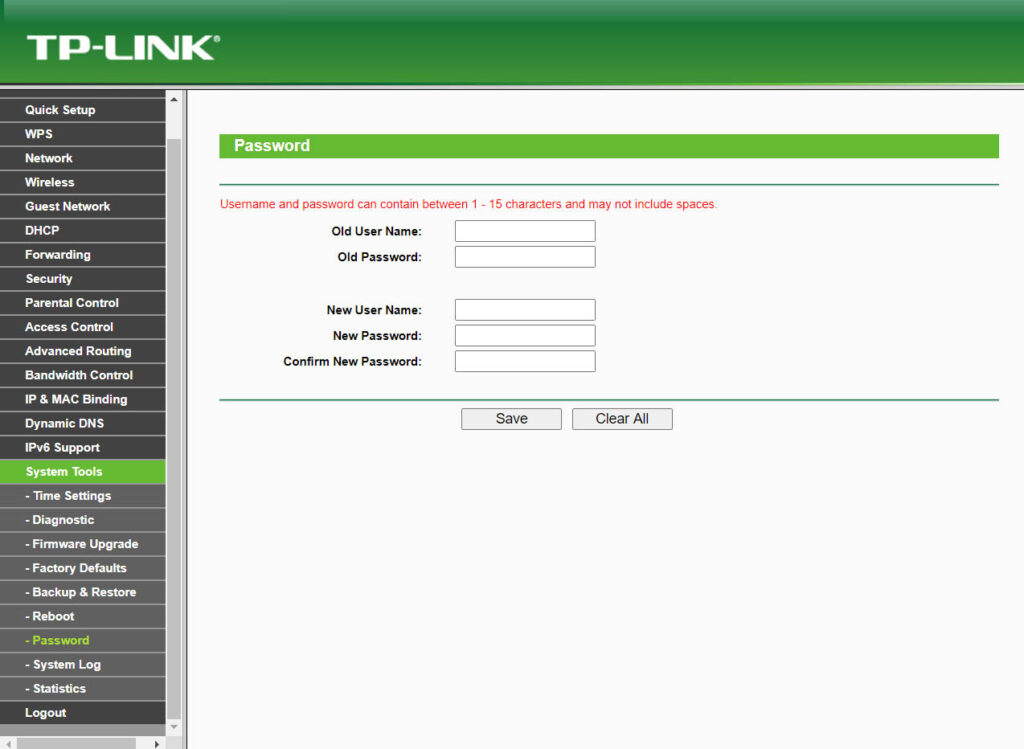
To change your router‘s default password, log in to your router’s web interface and look for the options to replace the administrator password. Usually, it’s under System Tools or General Settings. Some routers only let you change the password and not the username, and some routers support different user accounts (like the user, support, and admin, etc.) In any case, make sure to change the default password.
Step 4: Use MAC Address Filtering
MAC (Media Access Control) address is like a permanent name of a device. It’s a set of alpha-numeric digits (something like 1A-74-30-16-38-3B) that is unique for every device. So, you can use this MAC addresses to tell your router which are trusted devices and which are not.
From router settings, you can only allow specific devices to be connected to your Wi-Fi connection using the MAC Address Filter feature, thus further limiting unknown devices from accessing your Wi-Fi. You can check the MAC address of your specific device right from its system or also find it on your router DHCP list, given that all the Wi-Fi-enabled devices are connected to the router at that moment.
Next, create a list of MAC addresses of all your devices and access the “Wireless MAC Filtering” option in your router settings, it should be under the “Wireless” option. Here enable Mac filtering and click on “Add” to add all the MAC addresses of devices that you want to allow to be connected. When you are done, only the added devices will be able to connect to your Wi-Fi.
MAC address filtering is a common practice in big organizations and offices, which work with sensitive data. Although do keep in mind that MAC addresses can be spoofed with a simple app on both desktop and smartphone. So, don’t rely 100 percent on it.

Step 5: Decrease WiFi Range
If your WiFi signal goes way beyond your Home, then it does make sense to reduce the range of your Wi-Fi signal.
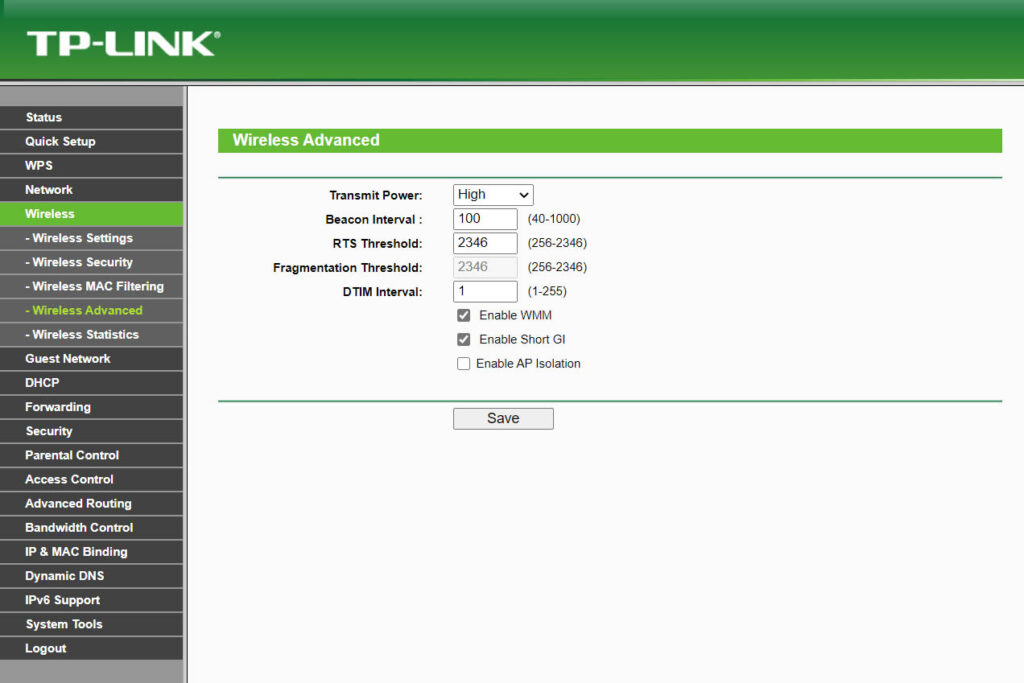
Some high-end routers have an option to control transmission power. Go to the advanced settings page of your router and look for TX Power. The default value is 70 (0 means no range and 100 means the highest range) and depending on your requirement you can make it around 50. However, router
However, if your router does not have the option to control transmission power from the software level, then you can do it from the hardware itself. Some people suggest, removing the one antenna to decrease the WiFi range. And although it’s very effective, it can possibly cause permanent damage to the router’s transmission card. A better way to reduce the signal strength is by placing your router inside a shoebox or wrap a foil around its antennas.
Step 6: Change Your Default SSID
SSID is the name of your Wi-Fi network, and by default, it’s either the router’s model number (like TP-Link WR740N) or some people choose to name their Wi-Fi name on their family member name (like Ishaan Jain).
Both of these are wrong practice because if the hacker knows which router model you are using, they easily look up the router’s online documentation and found some vulnerability. Similarly, if you are using a Wi-Fi name that can be used to personally identify you, the hacker will know who you are. Also since you haven’t taken the trouble to change the SSID name, chances are you haven’t changed other default settings, making you an easy target from the rest.
To change your SSID or Wi-Fi name, open your router setting page, look for Wireless, and then the SSID option. Usually, it’s next to the password change option in most routers. A good Wi-Fi name is something generic (mine is Free Internet.) Bonus points if you can come up with something creative and funny.

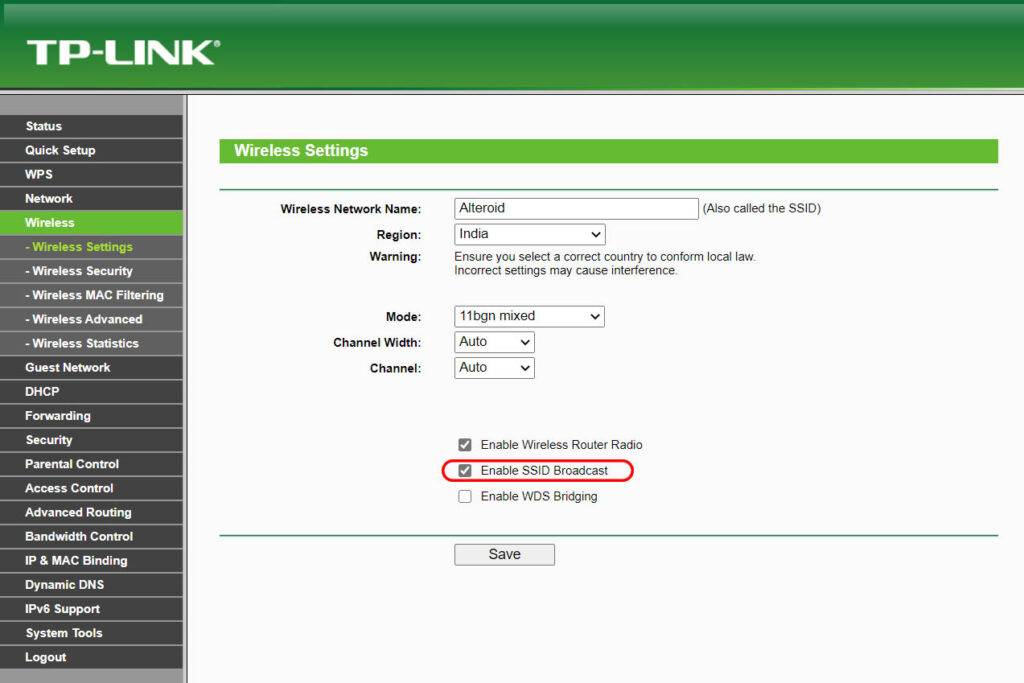
Step 7: Hide SSID Broadcasting
By default, your router will broadcast your SSID ( or your Wi-Fi name) continuously, so you could easily find and connect your devices to it. But do you know, you can also connect to Wi-Fi if you disable the SSID broadcasting.
You can disable SSID Broadcasting, so people won’t even know that there is a Wi-Fi connection around them when they open the Wi-Fi settings on their devices. In the router settings, you will find the option of “Disable SSID” or “Hide Access Point” or “Enable SSID Broadcast” checkbox under the “Wireless” option that you can use to disable the SSID.
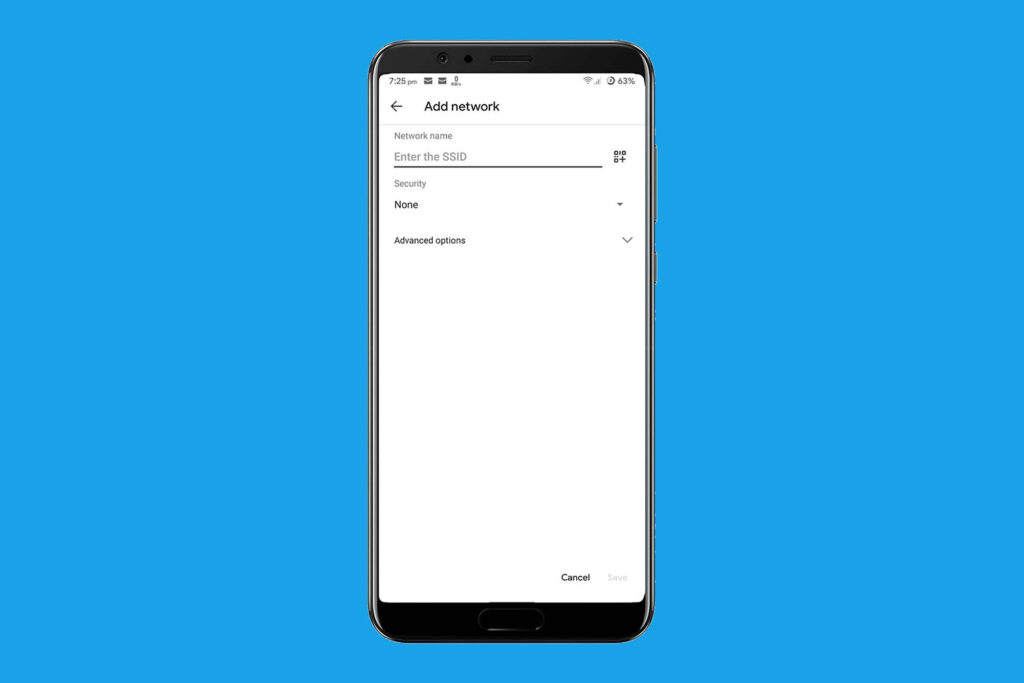
Once disabled, you will have to manually enter the SSID on your device while connecting, so memorize the SSID before doing this. Do keep in mind that hackers can use SSID Sniffer tool to easily see the SSID even if it is not being broadcasted.
Some advanced routers, let you make create more than one SSID, like one for guests and the other for the regular users. So, if you want more security and your router also supports more than one Wi-Fi network name, then you can one can be a dummy SSID to catch the hacker while hiding the actual one. Though, only do this, if you know what you are doing.
Step 8: Use A VPN
Anyone connected to your Wi-Fi can easily see what other people are browsing on their computers. And if they are good with computer stuff, they can even steal your password while you are login to less secure websites, using packet capturing tools like Wireshark, etc.
So, if you are in a situation, where someone is using your Wi-Fi whom you don’t trust, but also can not ask them to not use your Wi-Fi connection; then you can also use a good VPN service to hide your activity. VPN will encrypt all your activity and make it impossible for someone to see what you are doing. Though, some banking websites don’t respond well to VPNs, so also keep that in mind.
Step 9: Keep Your Wi-Fi Network Router In Safe Place
Now, I’m pretty sure most of you are not aware of this. But do you know, most routers have this feature, with which anyone can connect to the Wi-Fi network by just pressing a single button on the router and their devices?
This feature is called — WPS or Push’n’Connect (I’m sure you have heard of it) which is present in most routers these days. If you look at the back of your router, you’ll see a small button (often next to the LAN ports or reset button) labeled as WPS. Now, some Wi-Fi devices don’t have an interface where you can enter the Wi-Fi password (like Wi-Fi repeaters), and this is where the WPS button is useful. Simply press the WPS button on both devices simultaneously, and they will connect. No need to enter any Wi-Fi password.
Usually, this is a handy feature, but if you keep your router outside your sight, then a hacker can do some social engineering, gain access to your home and press a button to connect his or her smartphone to your Wi-Fi network. I know this sounds like some Mr. Robot episode, but why take the risk. Why not keep mount your router high on the walls. This is also good for the network coverage BTW.
Step 10: The Last Resort
If you are too paranoid, then you can disable Wi-Fi connection altogether and start using the internet on your PC using an ethernet cable. Yes, this is not a good Wi-Fi security advice, but it is a good solution if you don’t want to take any chances. The option to disable Wi-Fi should be under General or Basic section of the “Wireless” heading. This will completely disable the Wi-Fi and all the risks associated with it, but you will have to connect to the router directly using an ethernet cable.
Wrapping Up | Secure Your Wi-Fi Network
Encrypting your Wi-Fi with WPA2 encryption is the best way to protect it, but you can also follow other tips listed here to make further it hard for hackers to reach your router and hack it. Although do keep in mind that you will also lose some convenience when you take advantage of these security tips. For example, if you will enable MAC address filtering, you will have to reconfigure the router settings whenever you want to connect a new device to your Wi-Fi.
Did we miss something? How to you Secure Your Wi-Fi Network?
If you know any other ways to protect Wi-Fi, do share with us in the comments.