The Wi-Fi password is mostly set by the ISP technician, and they never ask the user what it should be. This creates issues in the future where the user often forgets what the password is and can no longer connect to the Wi-Fi when a device is bought or when he/she wants to share the password with someone else. Let’s see how you can find your Wi-Fi password using Windows 11 and how you can change Wi-Fi password on Windows so you can remember it later.
Find Wi-Fi Password on Windows 11
The steps to find the Wi-Fi password on a Windows computer are fairly easy. There are a few ways to do it, but we will share the easiest and fastest way so as to save time and effort.
Note: Your Windows computer must be connected to the Wi-Fi network in order to find the password. Windows saves all Wi-Fi passwords so that it can re-connect to the router without the user having to re-enter the password every time PC is booted, for example. If the PC was never connected to the Wi-Fi network, you can’t use it to find the Wi-Fi password as it is yet to be saved. You can also use your Android phone to find Wi-Fi password if it is connected to the network.
1. Click on the Start/Windows button and search for Control Panel there. Click to open it from the search results.
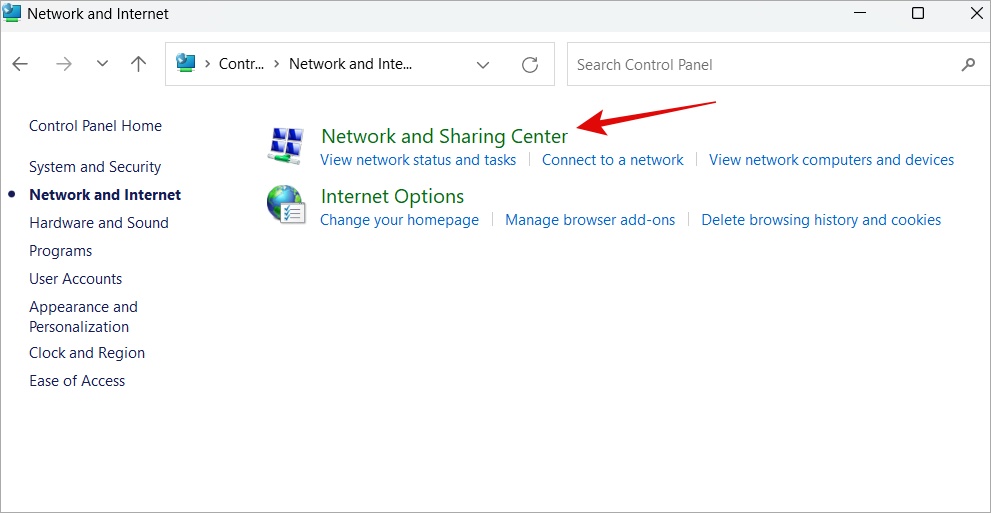
2. Go to Network and Internet.
3. Click on Network and Sharing Center on the next screen.
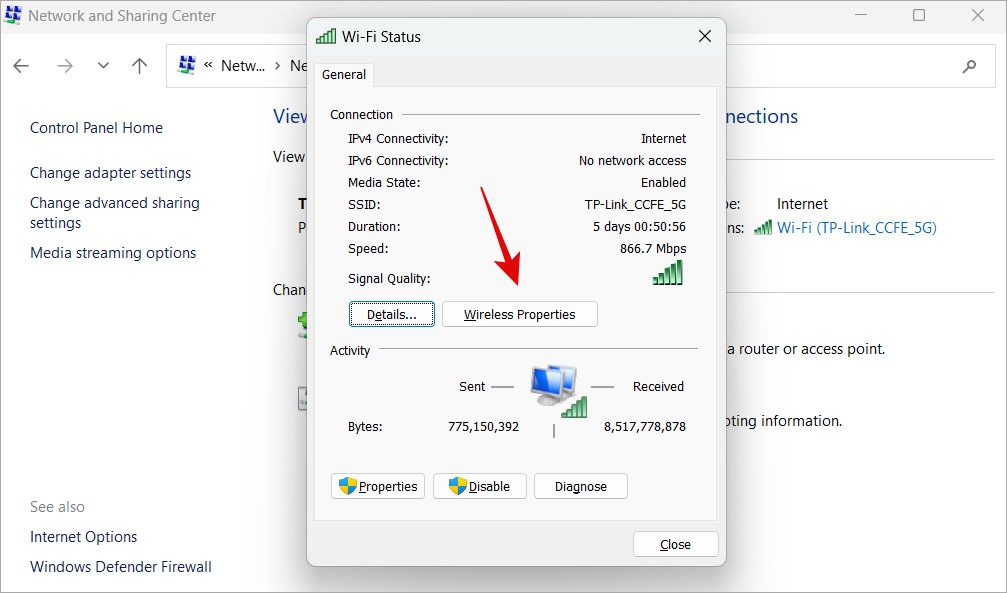
4. Click on the name of your Wi-Fi network name next to Connections.
5. In the pop-up that follows, click on Wireless Properties under the General tab.
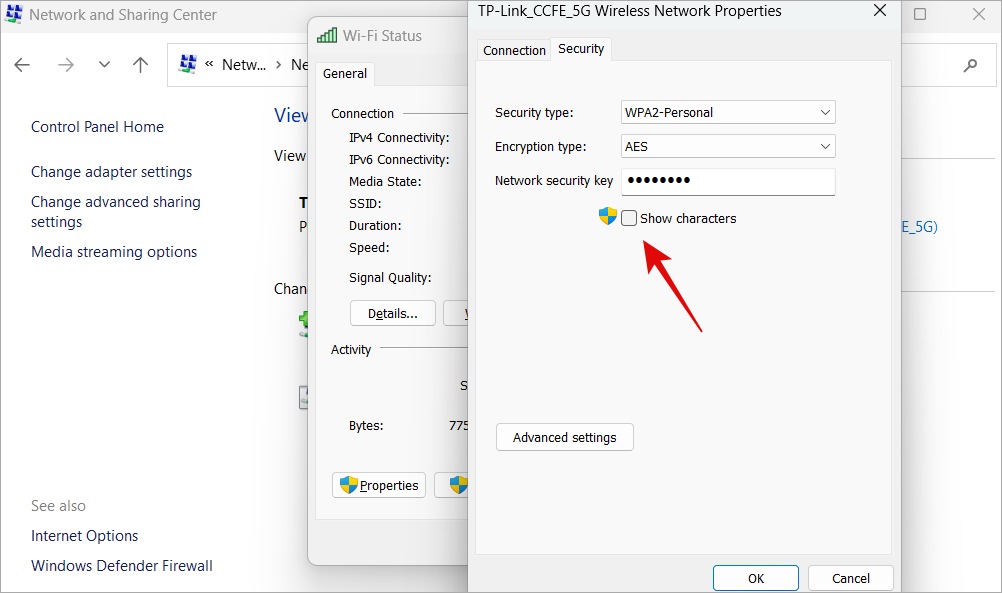
6. In the second pop-up, under the Security tab, check Show characters to view the password in the Network security key area.
Note: Make sure that no one is behind you or watching over your back when you do this so that your Wi-Fi password is not compromised.
You can now use this password to connect any device, Windows or any other OS, to the Wi-Fi network.
Change Wi-Fi Password on Windows 11
You now know how to find the Wi-Fi network’s password on Windows 11. It is equally easy to change your Windows Wi-Fi password. Learn you should change it in the next part.
1. Press Windows + I to open the Settings app. Select Network & internet in the left sidebar and then click on Advanced network settings in the right sidebar.
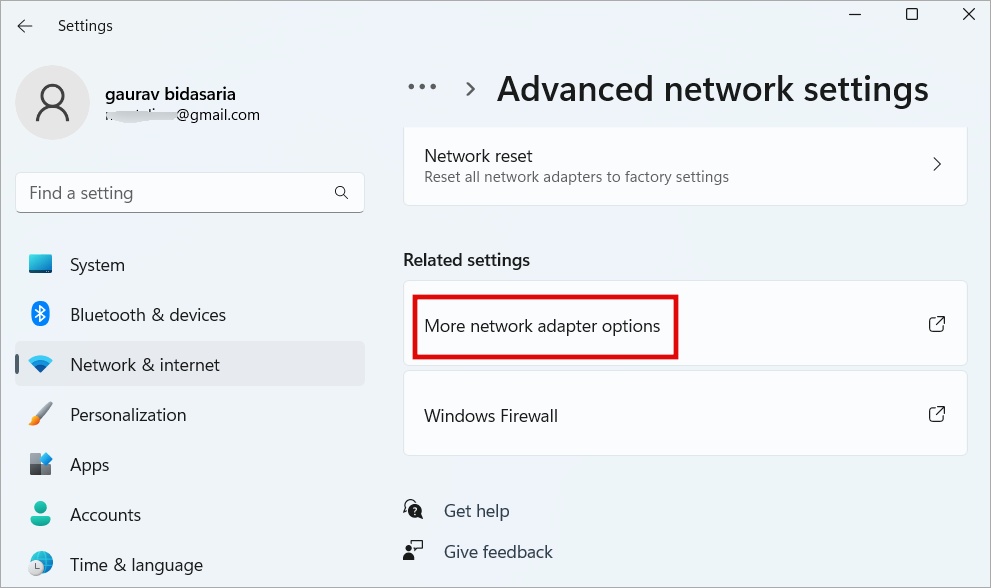
2. Scroll to the bottom of the screen and click on More network adapter options.
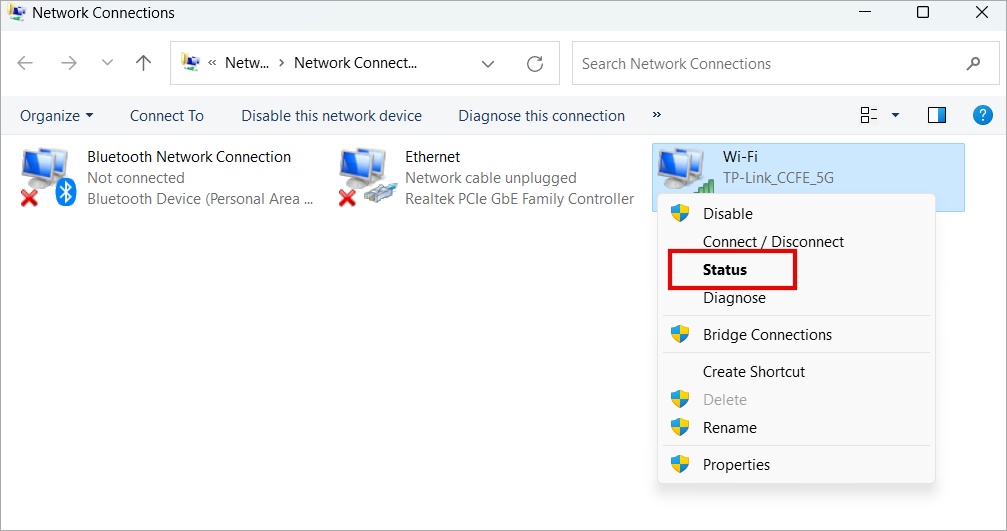
3. That will open Network Connections in a new window. Right-click on the Wi-Fi network that you are connected to and select Status from the context menu.
4. Click on Wireless Properties in the pop-up that follows.
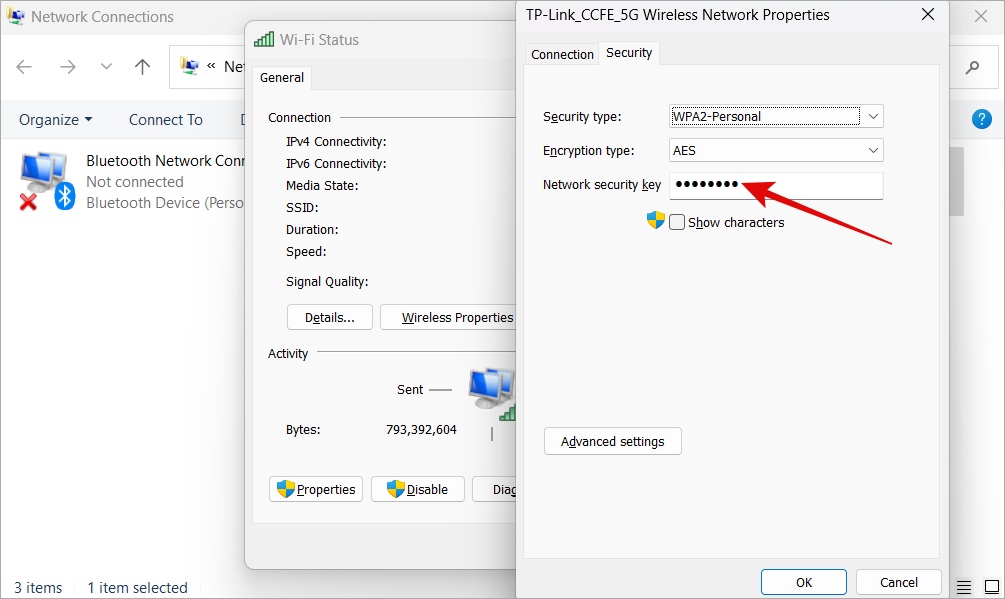
5. In yet another pop-up, you can change the Wi-Fi password by editing the value of the Network security key. That is your existing password too that we saw in the step above. Click on OK to save changes.
And you are done. You will now have to re-enter the new Wi-Fi password on all devices that were previously connected to the Wi-Fi network. They would be disconnected automatically.
Why Change Wi-Fi Password on Windows 11
We already saw one reason why you may feel the need to change your Wi-Fi network’s password in the intro. But there could be other reasons too.
- Your Wi-Fi password has been shared with way too many people congesting the network.
- An employee or guest has left, and you no longer want him/her to use your Wi-Fi network.
- You fear or know for a fact that the Wi-Fi network has been hacked and want to secure the same.
- The Wi-Fi password is complicated or hard to remember or was set by someone else and you want to change it to something that you can remember.
What’s Your Wi-Fi Password
Most users end up choosing poor or weak passwords for their Wi-Fi networks. It is recommended to choose a strong password when changing Wi-Fi password using a Windows computer that is alpha-numerical and has special characters in them. A stronger password will protect not just bandwidth but also your data offering privacy.
A good way to overcome this hurdle is using a password manager like Dashlane, BitWarden, or 1Password.
