It’s quite difficult to get work done without an active Wi-Fi connection on Windows 11. The situation gets tricky when the Wi-Fi option is greyed out on Windows. It leads to an unpleasant experience. Instead of working offline, follow the troubleshooting tricks to fix Wi-Fi greyed out on Windows 10 and 11.
1. Check Wi-Fi Key on the Laptop
Multiple factors can result in Wi-Fi being greyed out on Windows. We will start with the basics and move to advanced tricks to fix the issue. Old Windows laptops have a dedicated Wi-Fi key to enable or disable wireless internet connectivity. You should look for such a key on your keyboard and enable Wi-Fi.
2. Reset Network Connectivity
You can temporarily reset network connectivity using an Airplane mode trick on your PC.
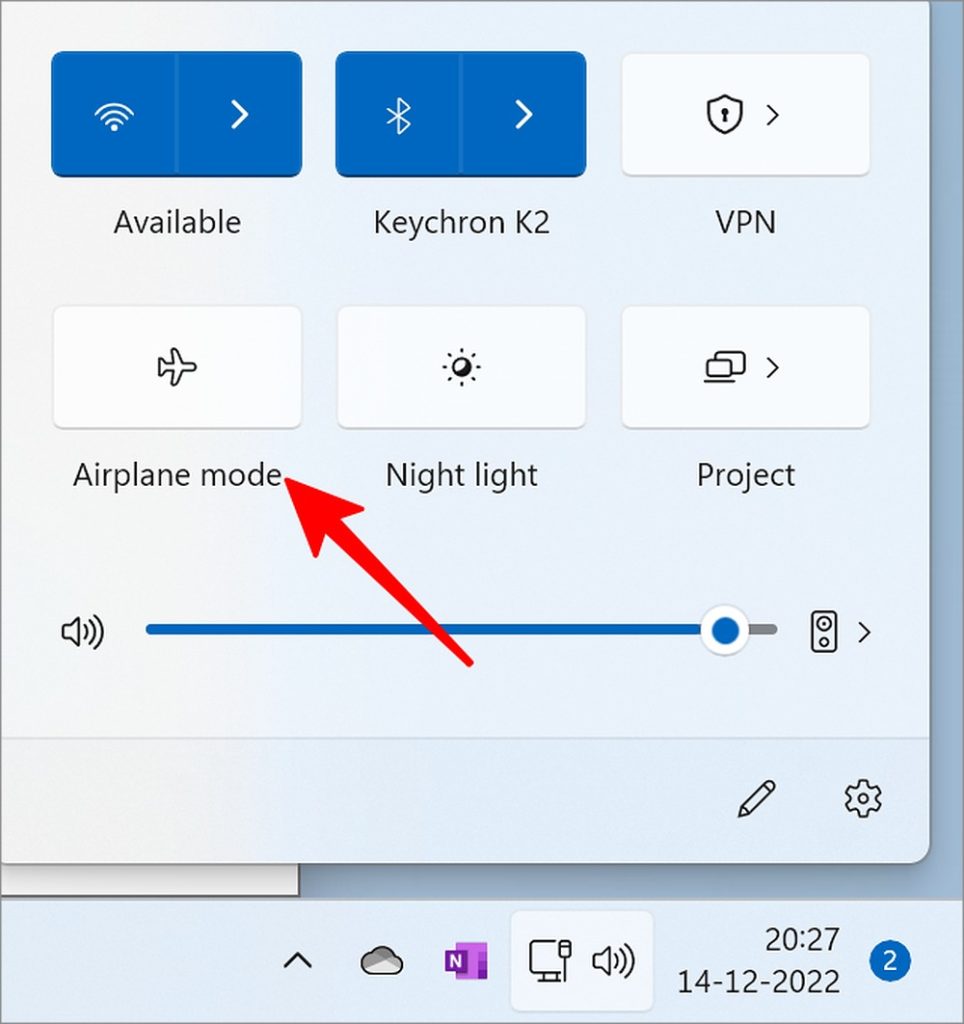
1. Click the connectivity option on the Taskbar.
2. Enable the Airplane mode and disable it after a couple of seconds.
3. Enable WLAN AutoConfig Service
The WLANSVC service provides the logic required to configure, discover, connect to, and disconnect from a wireless local area network. If the service is disabled, Wi-Fi gets greyed out on Windows.
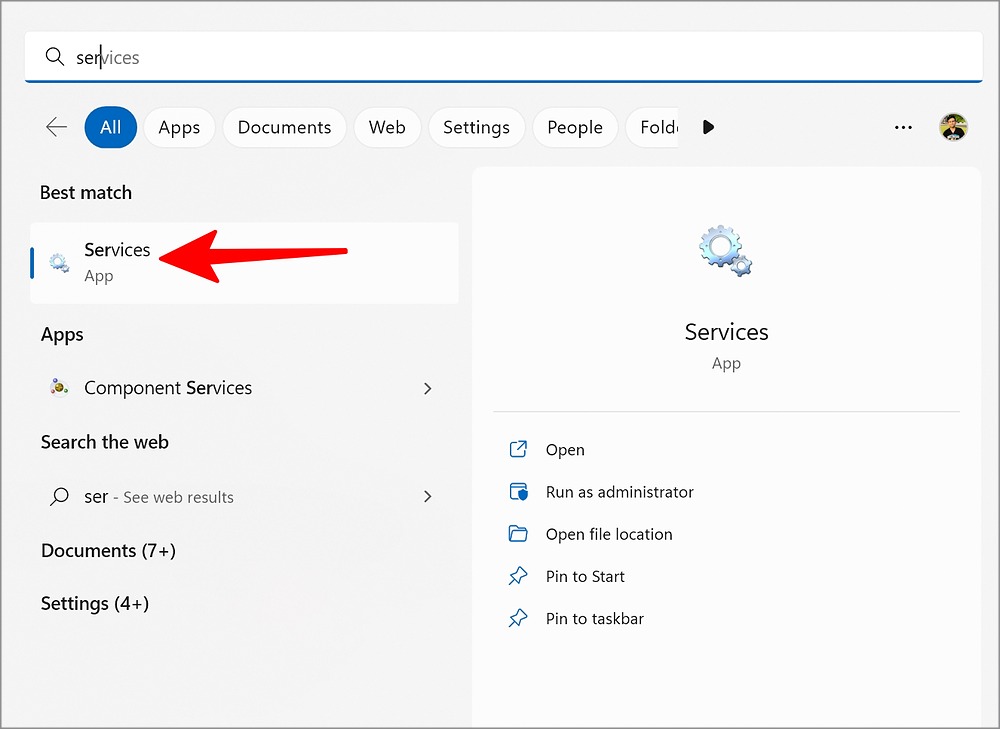
1. Press the Windows key and search for Services.
2. Hit Enter to open the app.
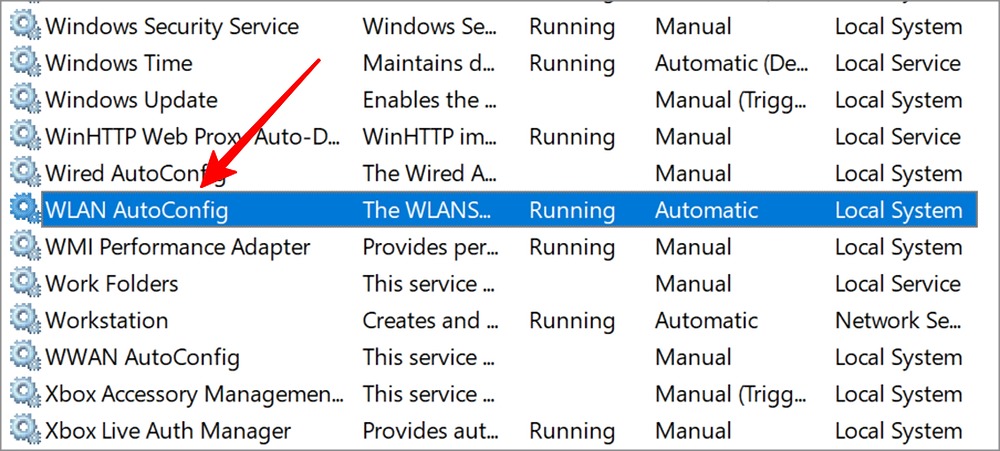
3. Scroll to WLAN AutoConfig and right-click on it.
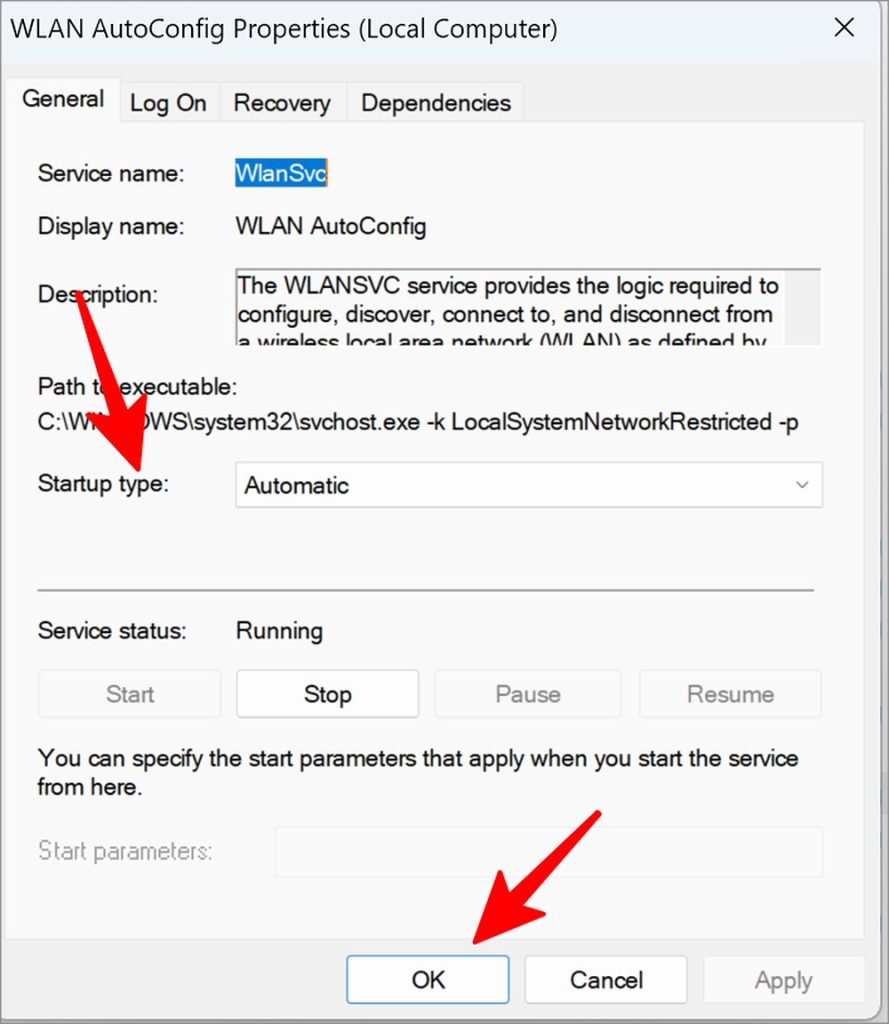
4. Select Properties and expand the Startup type menu.
5. Select Automatic, ensure Running status and hit Apply.
4. Reinstall Wi-Fi Network Adapters
Corrupt Wi-Fi network adapters can lead to Wi-Fi greyed-out issues on Windows. Follow the steps below to reinstall Wi-Fi network adapters using the Device Manager menu.
1. Right-click on the Windows key and select Device Manager.
2. Expand the Network adapters menu.
3. Right-click on the Wi-Fi adapter and select Uninstall device.
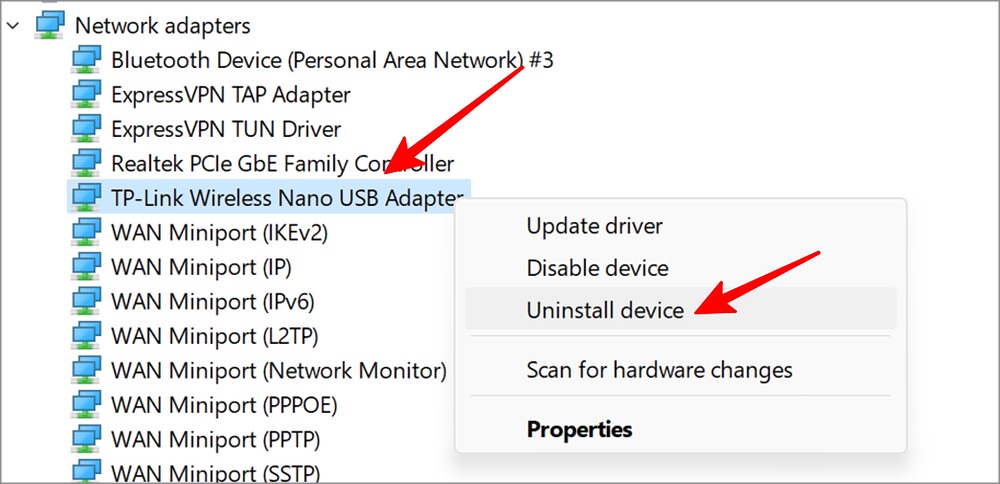
You should restart your PC, and the system will reinstall the required drivers during the reboot process.
5. Replug Wi-Fi Adapter
If you are using a Wi-Fi adapter on your Windows 11 PC, you can remove it and plug it back in to establish a wireless connection.
6. Use Another USB Plug
Most Windows desktop PCs come with several USB plugs to utilize. If Wi-Fi is greyed out on a specific slot, connect it to another USB slot and check the Wi-Fi function again.
7. Run the Network Adapter Troubleshooter
Windows comes with a built-in troubleshooter to fix network adapter issues. Here’s how you can use it.
1. Press the Windows + I keys to open Settings.
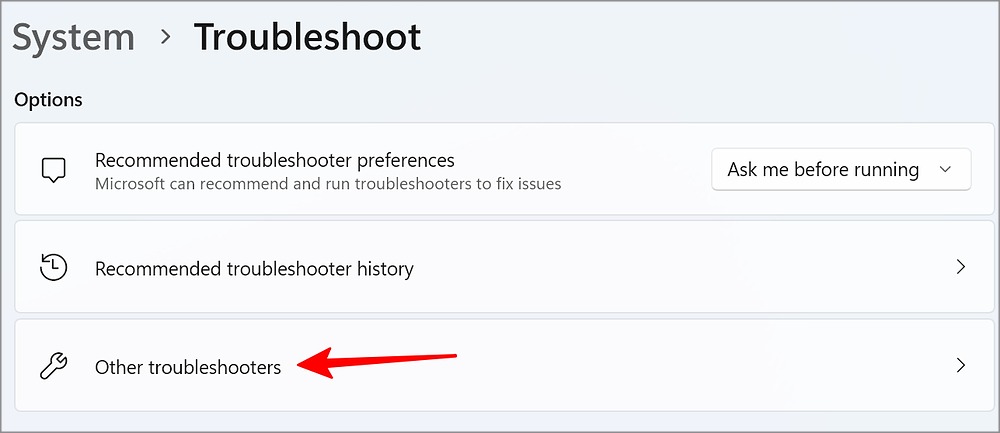
2. Select Troubleshoot from the System menu.
3. Open Other troubleshooter.
4. Run the Network Adapter troubleshooter on your PC and check if the Wi-Fi function is appearing or not.

8. Run Internet Connections Troubleshooter
You can also run the internet connection troubleshooter to fix Wi-Fi greyed-out issue on Windows.
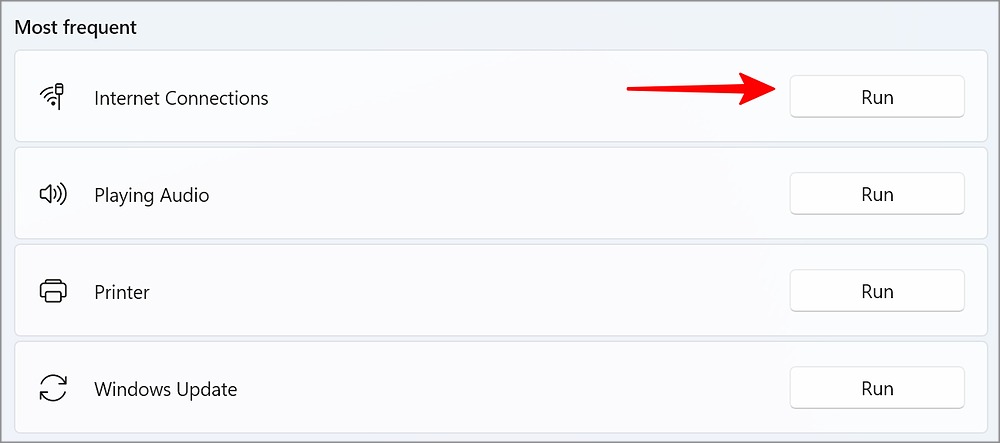
1. Head to the Other troubleshooters menu in Windows Settings (refer to the steps above).
2. Run the Internet Connections troubleshooter and follow on-screen instructions to complete the steps.

9. Restart Windows Explorer
Many have suggested restarting the File Explorer menu on Windows to fix Wi-Fi greyed-out problem.
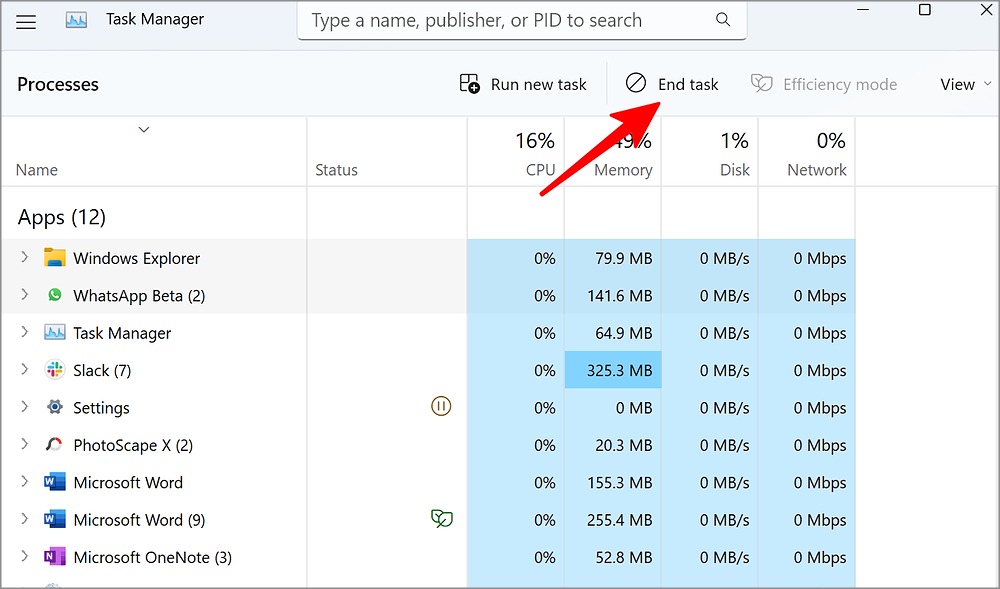
1. Right-click on the Windows key and open the Task Manager menu.
2. Select Windows Explorer and hit Restart task in the top right corner.
10. Change Wi-Fi Adapter Properties
When one of our Windows PCs faced a Wi-Fi greyed-out problem, we changed the Wi-Fi adapter’s properties and fixed the issue in no time. Here’s what you need to do.
1. Open the Device Manager menu in Windows 11 (check the steps above).
2. Expand the Network Adapters menu.
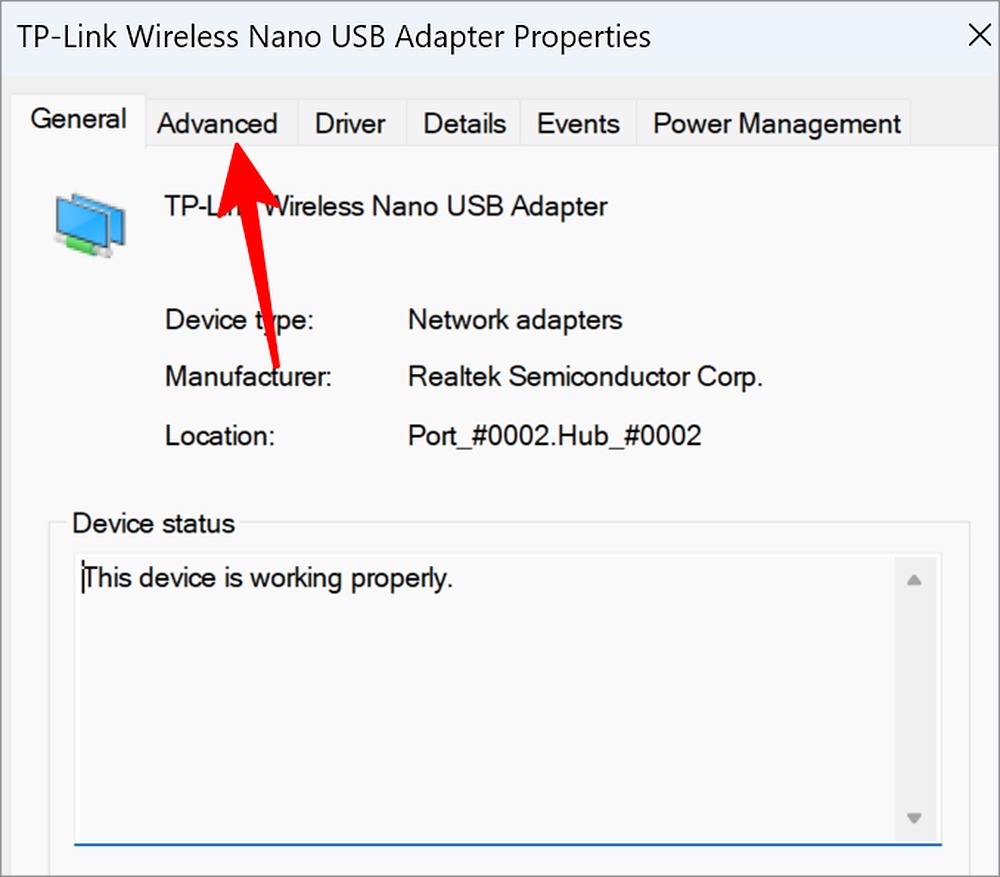
3. Right-click on your Wi-Fi adapter and open Properties from the context menu.

4. Move to the Advanced menu.
5. Select Wireless Mode and expand the Value menu.
6. Select a different wireless setting from the dropdown menu.
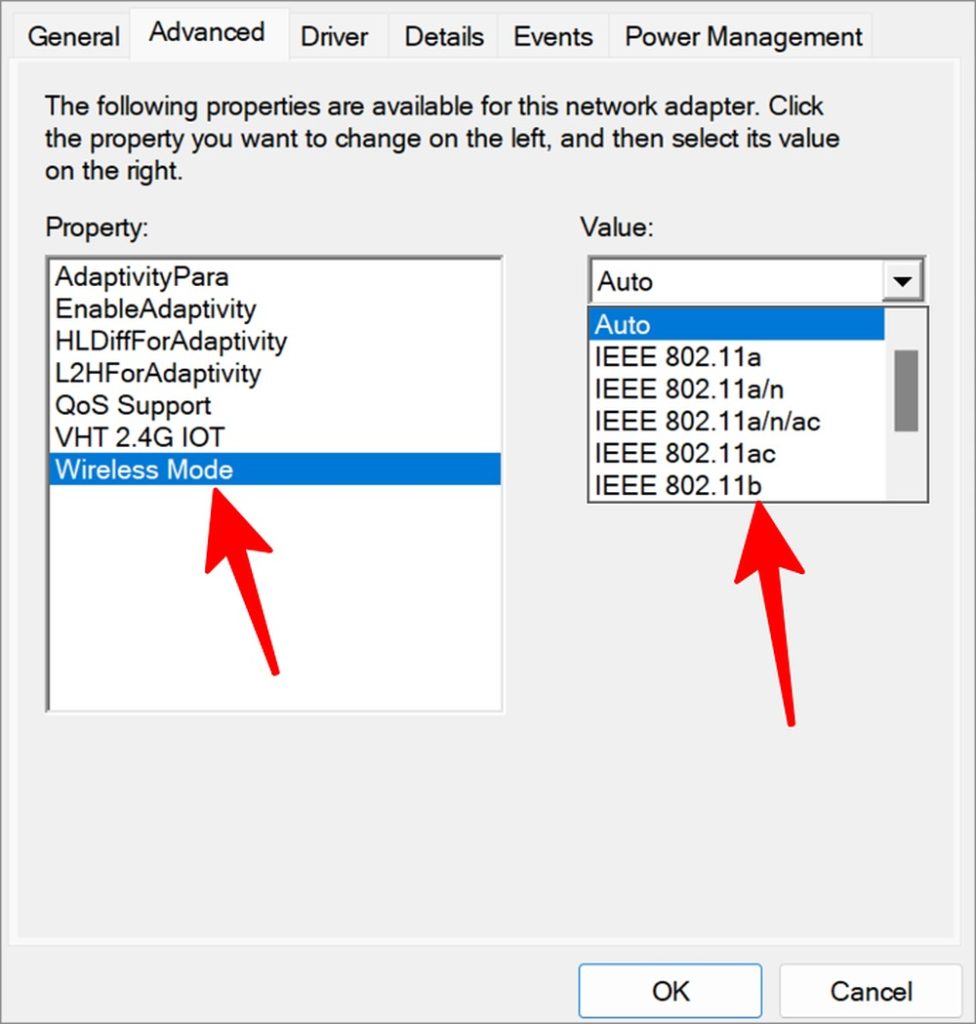
You can now check if the Wi-Fi option is active or not.
Enjoy an Active Internet Connection on Windows
If none of the tricks work, you should open BIOS on your computer and enable Wi-Fi. The ability to access BIOS varies from one manufacturer to another. You need to check the manual to learn to access BIOS. You can also get a new Wi-Fi dongle to fix Wi-Fi greyed-out errors.
