
Any person who has a rooted device must be familiar with SuperSU. It has been around for ages and has become the standard for rooting. However, with the latest apps making use of Google’s SafetyNet to check for root status and thus blocking usability, SuperSU is slowly becoming quite obsolete. This is where Magisk comes in. Magisk is currently the best alternative to SuperSU, as well as the future of rooting. Having said that, there’s a lot of confusion around Magisk and if you have confused too, let me first tell you what actually Magisk is.
What Is Magisk?
Magisk is an in-house development project by XDA developer topjohnwu, focused on providing root access to the user system-less-ly. It does so by modifying the boot image file and writing contents to the /data and /cache partition. What this essentially does is create a ‘mask’ of the /system partition. As such, all the modules and root access are granted in this mask and the original /system partition is left untouched. Also, think of Magisk as a mix of SuperSU and Xposed Framework.
Now that you have an idea what Magisk is, let’s talk about how you can install Magisk on your Android device:
How To Install Magisk On Android
Prerequisites:
- Unlocked Bootloader
- TWRP or any other Custom Recovery
- Magisk can be easily installed with the help of a flashable zip. You can get this .zip from here. Download it, and transfer it to your device.
2. Then, reboot to recovery mode using your device’s specific key combinations.
Note: Before proceeding further, you may want to create an android backup of your current ROM, just in case things go wrong.
3. Here, just tap on the Files button and browse for the Magisk ZIP file that you just downloaded or transferred.

4. After that, swipe the right to flash the ZIP file and continue installing Magisk.
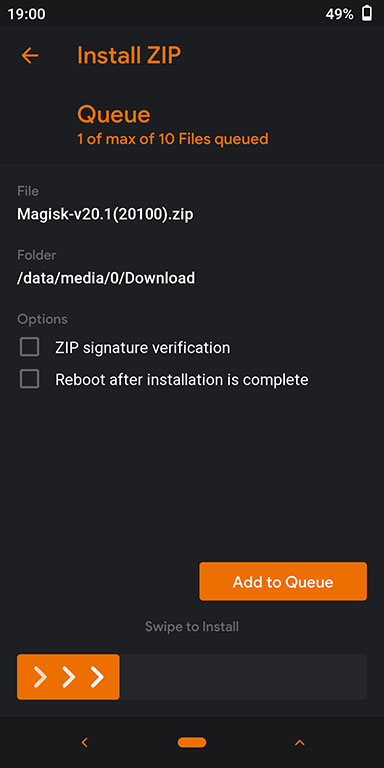
5. The installer modifies the boot image of your device and creates a new Magisk-v20.1(20100).zip a partition in your smartphone’s root directory. It also places necessary files in /cache and /data partition. Once the flashing process has been completed, you’ll see a “Reboot System” button. Tap on that.

6. Magisk has now been installed. Now, to manage it, you need to install Magisk Manager. Magisk Manager was recently removed from the Play Store, so you’ll have to install it through the APK file of the app. First, you must enable the installation of apps from “Unknown Sources” in Settings->Security. Now, download the APK file from here to your device and just install it.

That’s it, you can now use the Magisk Manager to manage different elements of Magisk.
How To Use Magisk Manager On Android
Once you’ve installed the Magisk Manager, you’ll be presented with a variety of options to tweak around with the features of Magisk. A simple swipe from the left will reveal the navigation drawer that’ll present you with a list of various options.
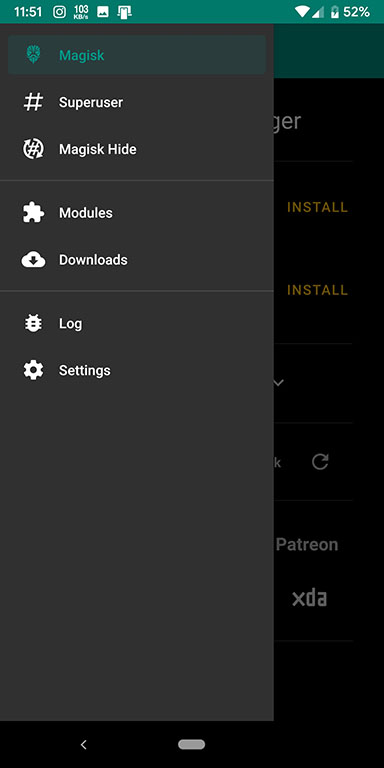
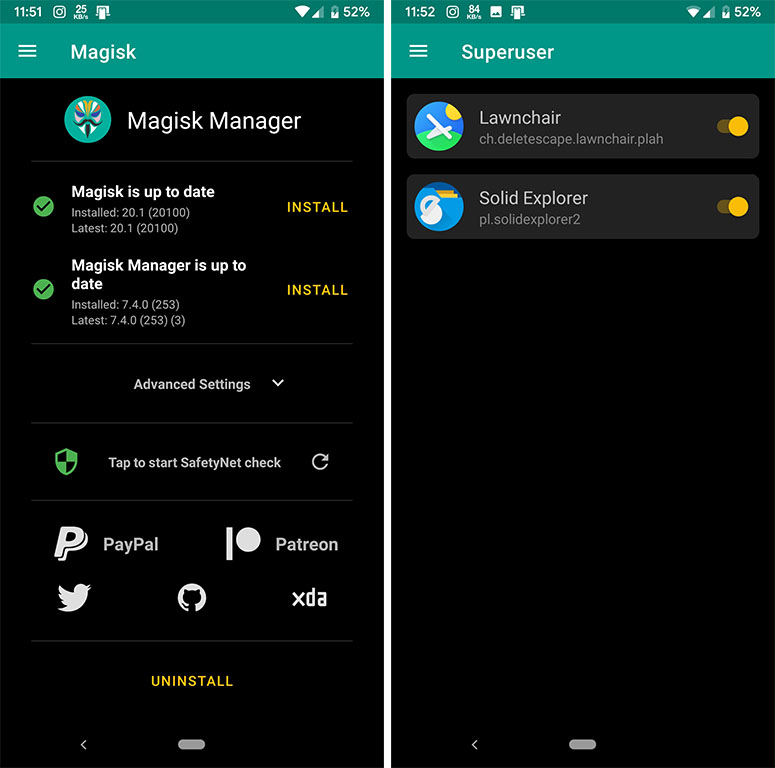
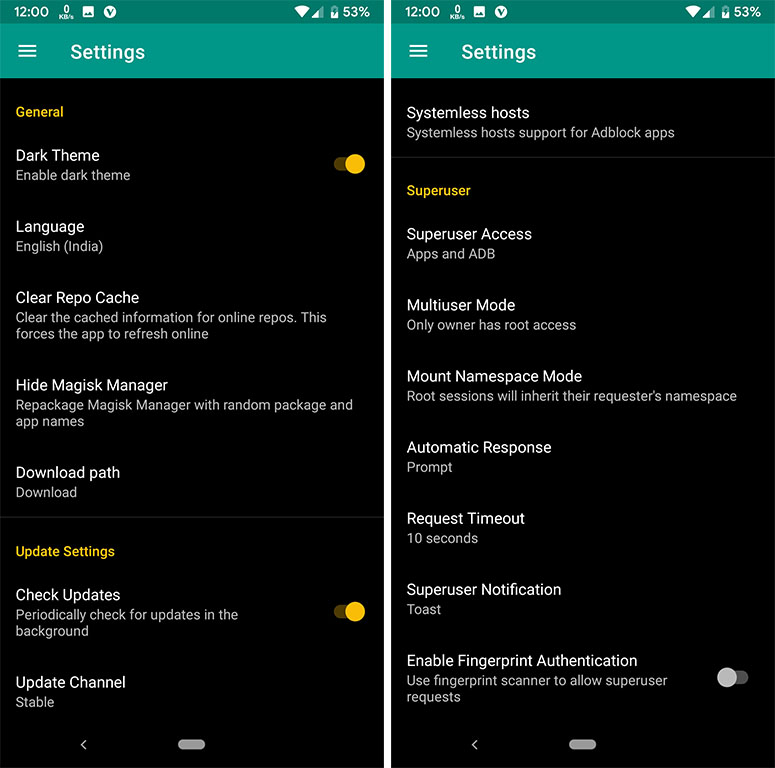
Head over to the “Install” section to check the version of Magisk that has been installed onto your device, as well as check for any updates. In case of any updates, you can easily download and install the new version from this section only. If you head over to the “Superuser” section, you can manage which apps you have granted or denied root privileges and alter them.
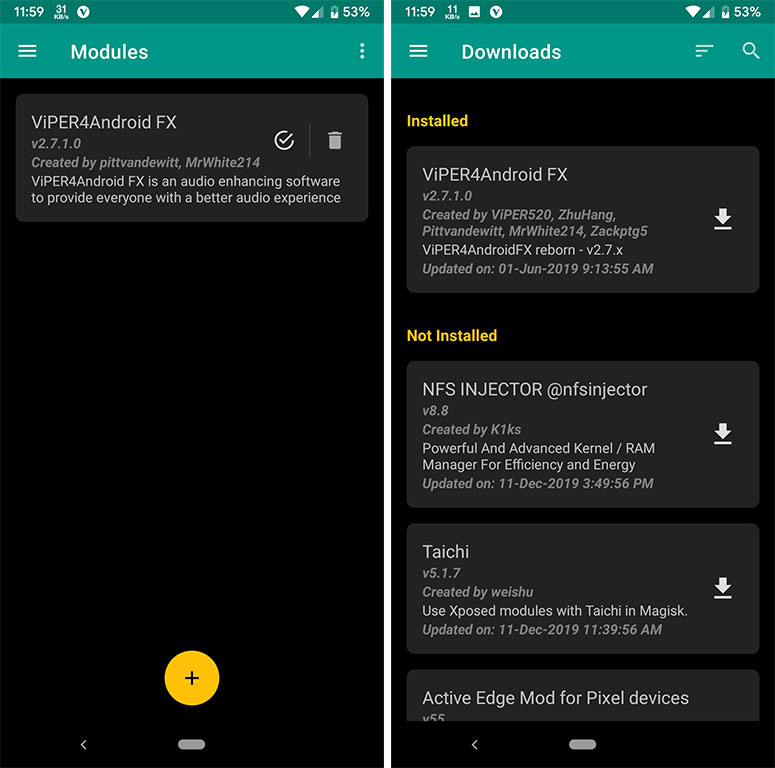
Next up is the “Modules” section. You can use this section to manage the already installed modules, as well as offload any Magisk module that any third-party developer may have made but is not available on the Magisk repo yet. The “Downloads” section is the direct link to the Magisk repo, from where you can directly download and install modules of your choice.
Next, we have the “Magisk Hide” page, that can be used to hide Magisk from being detected by any specific app. To do so, simply toggle the button next to the specific app, and they won’t be able to detect any Magisk installation. Magisk also offers a “Log” section, which basically, as the name suggests, keeps a log of all the activity involving Magisk.

Lastly, we have the “Settings” option. You can head here to alter various settings of the Magisk framework, such as enable the built-in BusyBox, install support for systemless ad-blocking, and alter various prompt settings for Superuser.
Various Uses Of Magisk On Android
1. Use Google Pay While Being Rooted With Magisk
As you might be aware, while Android does allow modifications and customizability to suit the consumer’s choices, it does refrain some of its essential elements to be used on a stock and non-rooted device only, for security purposes. One such feature is Android Pay. Android Pay rigorously checks the system for root access and does not work on any system that has root access. This can be avoided with the help of Magisk.

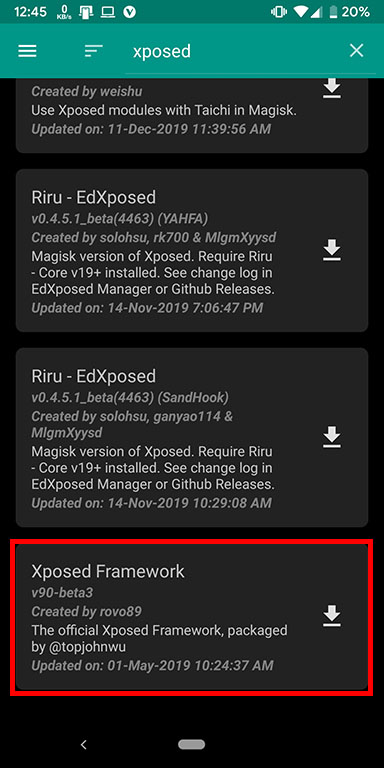
2. Use Magisk To Install System-Less Xposed Framework
Xposed Framework is one the most widely used system alter methods available out there. It contains various sub-modules that one can use to tweak their device to one’s liking. As such, even the Xposed Framework requires root access, but this can be bypassed with the help of Magisk. Simply go to the Downloads Section and download the Xposed Framework according to your Android version (SDK 21 – Android 5.0.x; SDK 22 – Android 5.1; SDK 23 – Android 6.x)
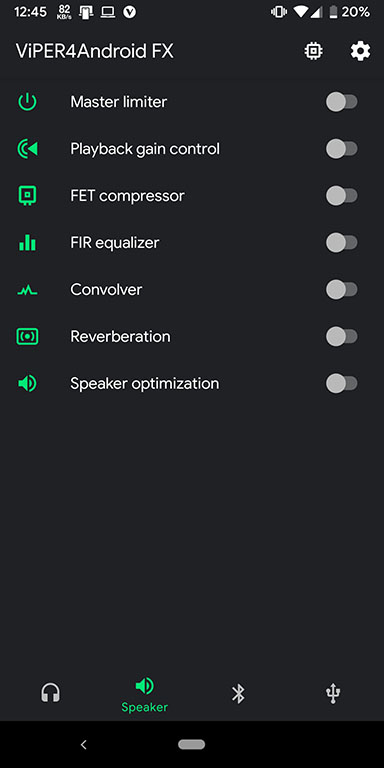
4. Install Sound Mods Such As ViPER4Android FX
Viper4Android is one of the most widely used sound mods for Android, simply because of the plethora of options, it offers under the hood. While Viper4Android doesn’t require root access as such, it does require one to change its SELinux Status. This is overcome by installing Viper4Android from the Downloads Option. Once you’ve installed the module from Magisk, you need to install Viper’s Android app to be able to make use of the settings. You can download the app from here. Once you’ve installed the app, you can make use of a large number of mods offered by Viper4Android.
How To Uninstall Magisk On Android
In case you want to uninstall Magisk, simply download the uninstaller’s Flashable zip from here to your device, and flash it via TWRP or any other custom recovery. Make sure to wipe Cache/Dalvik upon uninstallation of Magisk to avoid any conflicts.
Easily Root Your Device And Do Much More With Magisk
You can use Magisk to gain root access, modify various elements, install handy modules, and gain complete control over your device, without ever tampering the /system partition. So, have you ever used Magisk? Let us know about your experiences and your use cases. Also, if you know about some other features that we have missed out on or if you have any doubts regarding Magisk, do mention them in the comments below.